
 This dessert is a hit for BBQs!
Not too long ago my uncle was told he couldn't eat corn on the cob... one of his favorites. Anyone who knows me, knows that I am always waiting for that perfect opportunity to pull a prank on someone. Here was my chance.
I decided to make him corn on the cob - in dessert form. And so was born, the corn on the cob cupcake.
They are very simple to make - and not too expensive either.
So here's what you need
- Your Favorite White Cake Recipe - which I included in the previous blog
- Your Favorite Vanilla Frosting Recipe - which I included in the previous blog
- 2 Cups Jelly Belly Jelly Beans (in various yellows like lemon, banana, pineapple and even some white like vanilla or toasted marshmallow)
- 4 yellow salt water taffy (or you can use 2 pieces of laffy taffy)
- Black and White colored sprinkles
- Corn Ear Holders
- White Paper Baking Cups
- Yellow Food Coloring
Ready? Ok let's wash our hands and get right in...
Here's what you're gonna do
1. Check your cake recipe for your specific baking temperature, and preheat your oven to that degree.
2. Start mixing your favorite white cake batter.
3. Arrange 12 white paper baking cups in your Cupcake Tin, and fill 2/3 the way up (HINT: fill a ziplock bag with your batter and cut a tiny hole in the bottom corner to squeeze batter into the cups).
4. Bake cupcakes for the recommended time of your recipe, or until the tops are slightly golden. Then cool them on wire rack - careful not to burn yourself getting them out.
5. Mix your favorite vanilla frosting recipe, adding a very light yellow tint with the yellow food coloring (HINT: start by adding only 3 drops. If you need more, add one at a time).
6. When your cupcakes have cooled, frost them with your yellow frosting.
7. Arrange 3 cupcakes next to each other on a corn serving dish, a platter, or picnic type plate.
8. Start arranging jelly beans in random order. You want to use a lot of the solid yellow color, throwing in some banana colored, toasted marshmallow and a few solid white beans every now and then (HINT: It's easiest to start with a middle line, and work your way to the edges).
9. 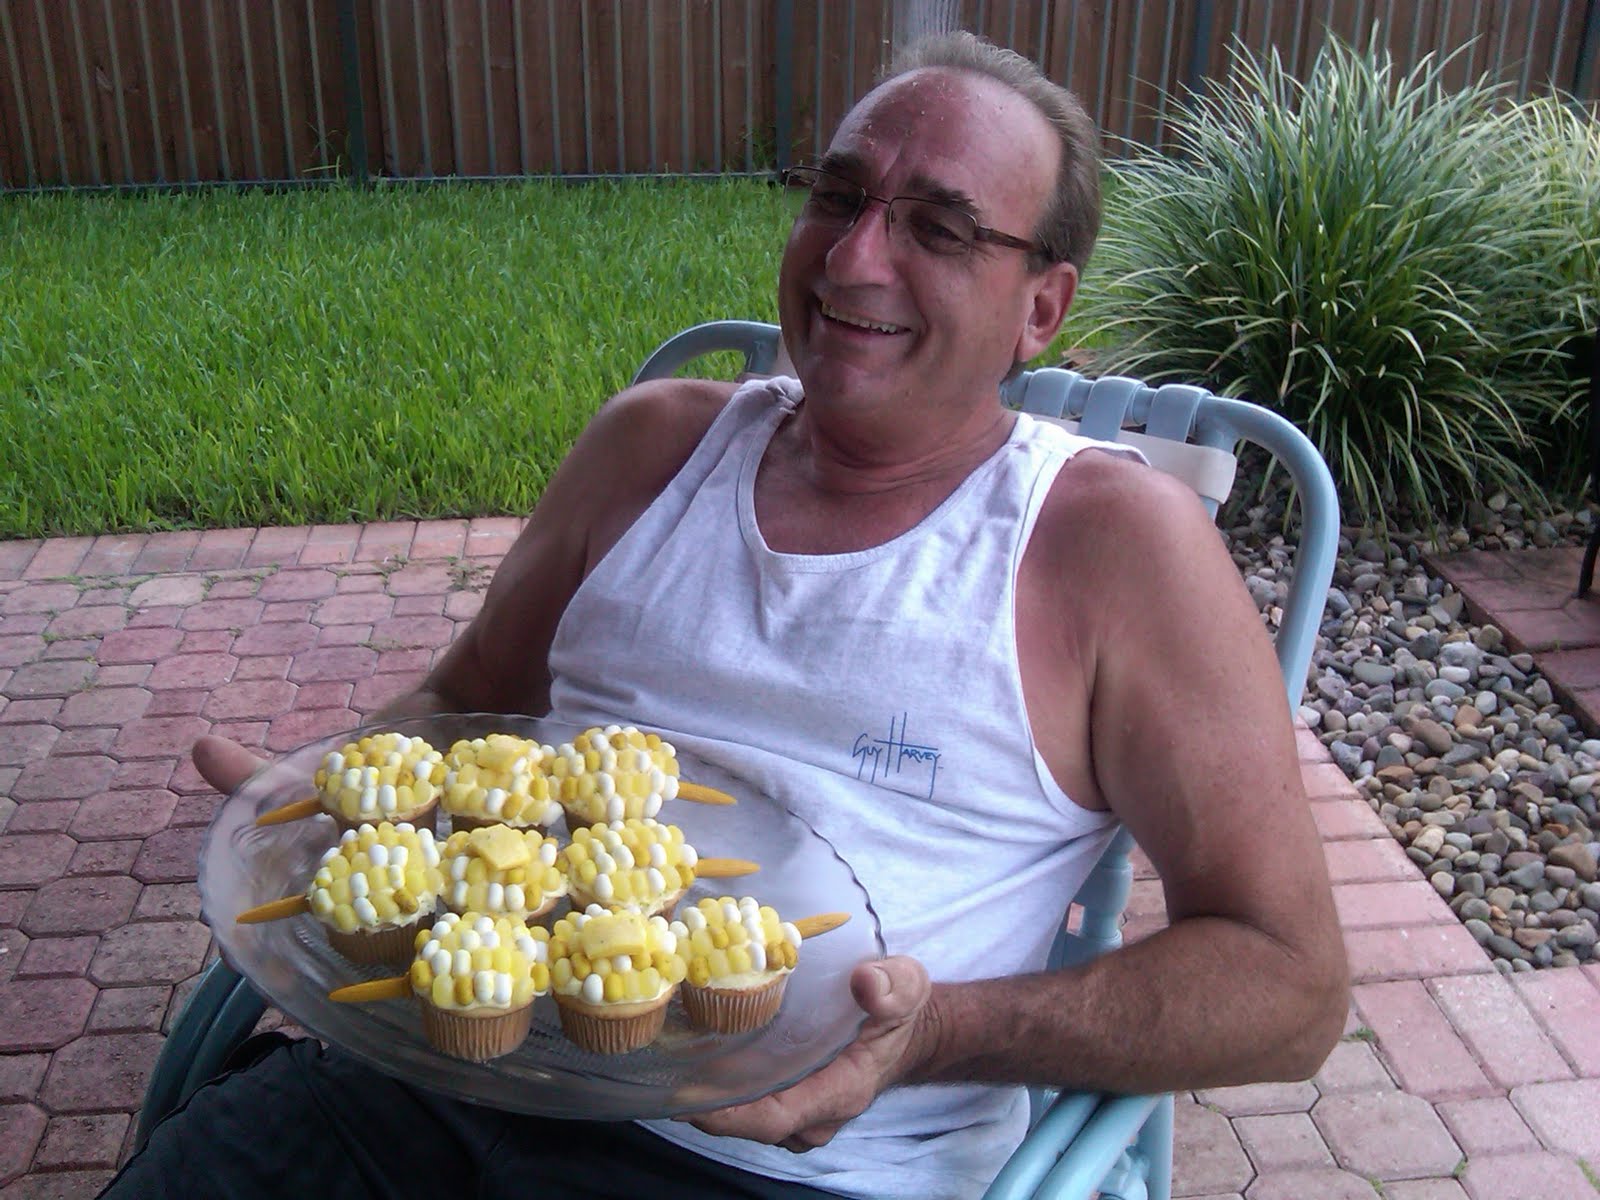 Flatten the yellow taffy while it's still in its wrapper (HINT: If you don't have a rolling pin, use a sturdy pencil or marker). Unwrap it and using scissors, cut it into a square shape. You can mold it quite easily into a buttery looking pad with smooth edges. Place pad on top of one of the jelly-beaned cupcakes.
10. Sprinkle some black & white sprinkles on top of the completed cupcakes. Be sure to get a few specs on the butter pad too.
11. Push a corn ear holder on each end of the outside cupcakes.
And that's it!!! Now you can serve them on your tray or platter and everyone will get a good laugh! I know we sure did!


